A picnic is meant to be relaxing, but poor organization can turn it into a stressful, time-consuming task. The secret to a smooth picnic day is in smart preparation, efficient packing, and quick setup. By planning, streamlining your menu, and keeping your gear ready to go, you can save valuable time before, during, and after your outing.
Should I plan my picnic the day before to save time?
Yes. Doing key tasks the day before eliminates last-minute rushing. Decide on your menu, check supplies, and prepare anything that can be stored overnight. Wash and chop fruit, prepare salads, and marinate meats if needed.
Example: If your menu includes sandwiches, you can slice bread, portion fillings, and store them separately. On picnic day, it’s just a matter of assembling them—saving 20–30 minutes of prep.
How can I pack to keep food fresh without wasting time?
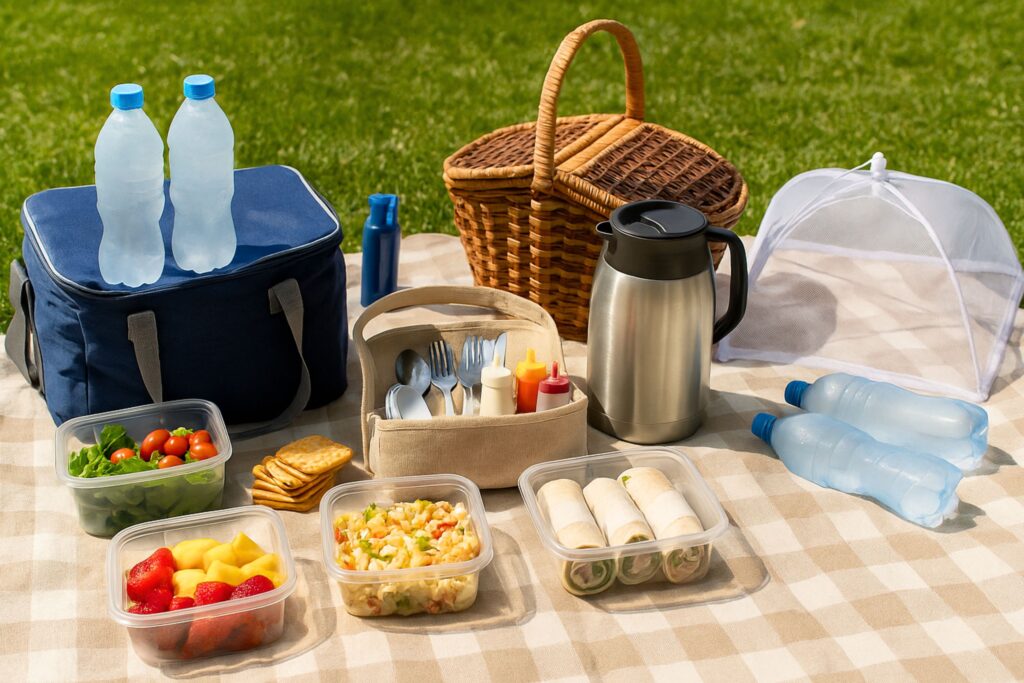
Use frozen water bottles instead of ice packs—they keep food cold and can be used for drinks later. Store food in airtight containers to avoid leaks and make stacking easier. Pack items by weight and sensitivity: heavier chilled foods at the bottom, snacks and bread on top.
Example: One cooler for food and one for drinks prevents constant opening of the food cooler, which helps maintain safe temperatures and saves time reorganizing.
What’s the fastest way to organize utensils and condiments?
Keep a pre-packed picnic caddy year-round. Fill it with reusable cutlery, plates, napkins, wet wipes, and small condiment containers. After each picnic, wash and restock the picnic supplies so they’re ready for the next trip.
Example: Using travel-sized bottles for sauces saves space, avoids carrying full jars, and means you can grab the caddy and go without sorting through your kitchen.
Can I speed up packing serving gear?
Yes—dedicate a tote or crate just for picnic gear. Include a cutting board, a knife in a sheath, serving spoons, and a bottle opener. Keeping these items separate from daily kitchenware means you never waste time searching for them.
Example: A collapsible serving bowl or tray can fit flat in your tote and be set up in seconds.
How do I choose food that saves prep time?
Select dishes that are easy to make in advance and hold up well during transport. Pasta salads, wraps, quiches, and hard cheeses travel well and require no on-site preparation. Pre-portion servings so guests can grab and eat without extra handling.
Example: Instead of a layered salad that needs tossing on site, pack ready-mixed salads in single-serve containers. This saves setup and cleanup time.
What’s the quickest way to handle drinks?
Fill reusable bottles or insulated flasks at home. For larger groups, prepare big batches of drinks in an insulated jug with a built-in tap. Freeze part of the liquid overnight so it stays cold for hours without extra ice.
Example: Half-freeze lemonade in the jug, then top it with fresh lemonade in the morning—no extra chilling needed.
Can I prepare for the weather and insects without extra hassle?
Yes. Keep a “conditions kit” ready: insect repellent, mesh food covers, a waterproof picnic blanket, and a compact umbrella. Store it with your picnic gear so you can grab it without searching for items separately.
Example: A pop-up sunshade can be kept in your car and set up in under two minutes, saving time if shade is limited.
How can I set up my picnic spot quickly?
Pack picnic items by category—food, drinks, utensils—so you can place them directly where they’re needed. Use stackable containers and folding tables to reduce trips back and forth.
Example: If your food cooler, drink cooler, and utensil tote are each packed for direct access, you can start eating within minutes of arriving.
Quick Time-Saving Picnic Checklist
- Plan menu and prep ingredients a day ahead
- Use frozen water bottles as dual-purpose coolers and drinks
- Store food in airtight, stackable containers
- Keep a pre-packed utensil and condiment caddy
- Maintain a dedicated picnic gear tote
- Pre-portion servings for faster setup and less cleanup
- Prepare drinks in bottles or insulated jugs
- Have a ready “conditions kit” for weather and insects
- Pack items by category for quick unloading
Step-by-Step Guide — Picnic Organization Hacks to Save Time
Step 1 – 48 hours before:
Decide on the date, number of people, location, and duration of the picnic. Keep the menu simple—one main dish, one side, fruit, and one drink. This limits prep work and reduces the number of items to carry.
Step 2 – 48 hours before:
Write a detailed shopping list, grouping items by store section. Don’t forget time-saving essentials like frozen water bottles, wipes, and trash bags.
Step 3 – 36 hours before:
Do all your shopping in one trip, buying both non-perishables and perishables where possible. This avoids extra runs to the store.
Step 4 – 24 hours before:
Prepare dishes that can be stored overnight, such as pasta salad, quiche, or wraps. Wash and chop fruits, then refrigerate. Chill everything you can ahead of time.
Step 5 – 24 hours before:
Fill water bottles three-quarters full and freeze them. They will keep food cold during transport and double as drinks at the picnic.
Step 6 – 24 hours before:
Pre-portion food into individual containers so guests can grab and eat without extra serving time on-site.
Step 7 – 24 hours before:
Pack a condiment and utensil kit with travel-sized sauce bottles, cutlery, napkins, wet wipes, and sanitizer. Keep this kit stocked year-round for quick grab-and-go use.
Step 8 – 24 hours before:
Prepare your dedicated picnic gear tote with reusable plates, cups, a small cutting board, a sheathed knife, serving spoons, and a bottle opener.
Step 9 – 24 hours before:
Have a “conditions kit” ready with insect repellent, mesh food covers, a waterproof blanket, and a pop-up sunshade or compact umbrella.
Step 10 – 12 hours before:
Pre-fill drink bottles or an insulated jug. For large batches, freeze part of the drink overnight so it stays cold for hours without ice.
Step 11 – 12 hours before:
Plan a cooler layout. Keep food and drinks in separate coolers to avoid unnecessary opening and warm air entering.
Step 12 – 2 hours before departure:
Pack your coolers, placing heavy perishable items at the bottom with frozen bottles around them. Keep snacks and bread on top for easy access.
Step 13 – 2 hours before departure:
Group your items by function—one bag for food, one for drinks, one for utensils and gear, and one for trash and recyclables.
Step 14 – Departure:
Load your car or carrier so the coolers are nearest the opening, with the picnic blanket and sunshade last in for quick setup on arrival.
Step 15 – On-site setup (around 3 minutes):
Lay out your blanket (waterproof side down), position the food cooler in the shade, set your utensil caddy in the middle, and place drinks off to one side.
Step 16 – During the picnic:
Keep food cool by limiting cooler openings. Use mesh food covers to protect dishes. Keep trash bags clipped to a chair or crate for easy disposal.
Step 17 – Before leaving:
Pack leftovers into resealable bags or containers, tie up trash bags, and separate recyclables. Wipe down gear so it’s ready for storage.
Step 18 – At home:
Wash and repack your picnic kit immediately. Refill frozen water bottles and restock missing items so your gear is ready for the next picnic.
Quick Examples & Micro-Tips
- Wraps that don’t fall apart: Roll tightly in parchment, twist ends like candy, and label (“chicken”, “veg”). Saves 5–7 minutes on-site sorting.
- No soggy salad: Pack dressing in a mini bottle; toss in the container right before serving. Avoids on-site mixing bowls.
- Zero rummaging: Keep the sheath-knife + cutting board on top of the gear tote; you’ll slice fruit/cheese in seconds.
- Shade in minutes: A pop-up sunshade lives in the trunk—deploys under 2 minutes and keeps the food cooler.
Trash without trips: Clip a trash bag to the crate handle; everyone uses one spot—cleanup finishes in one pass.
FAQs
How can I choose a picnic location that saves setup time?
Select a spot with built-in amenities like picnic tables, shade structures, or nearby parking. This reduces the amount of gear you need to carry and set up.
What’s the best way to assign picnic tasks to a group?
Create a shared checklist and delegate: one person handles mains, another drinks, and another gears. Splitting tasks ensures everything is ready faster without overloading one person.
Can using color-coded containers make packing quicker?
Yes—assign colors to food types (e.g., green for salads, blue for snacks) so you can instantly find what you need without opening every container.
How can I cut down the time spent unloading from the car?
Pack in a few large, organized containers instead of many small bags. Use a folding trolley to transport everything in one or two trips.
Are pre-packed picnic kits worth it for saving time?
Yes—commercial kits with plates, utensils, and storage space save prep time and reduce the chance of forgetting essentials. They also make repacking faster.
How can I use labels to speed up serving?
Label containers with the dish name and any dietary notes. This prevents questions during the picnic and lets guests serve themselves immediately.
Can digital reminders help in picnic preparation?
Absolutely—set phone reminders for tasks like freezing water bottles or loading the cooler, so nothing is missed in the rush.
How does batch cooking help in picnic time management?
Prepare larger portions of a dish you already make during the week, then store part of it for the picnic. This eliminates a separate cooking session.
Is it faster to pack snacks in their original packaging or portion them?
Pre-portioning into grab-and-go bags saves serving time at the picnic and reduces the need for serving dishes.
How can I minimize post-picnic cleanup time?
Use compostable or recyclable containers that can be disposed of responsibly on-site. This reduces the washing required once you return home.
✨ Love picnics as much as we do?
Join our community and get fresh picnic ideas, tips, and inspiration straight to your inbox. No spam, just simple ways to make every picnic special. 🌿🍓